

Table of Contents
Overview
The Portal allows you to locate, use, test, and get help for your APIs.
This guide provides step-by-step instructions on how to use the Portal. It includes topics such as navigating the portal and a description of the purpose of each page within the Portal.
Contacting Client Support
Client Support is available by phone toll-free at (800) 937-3661, Monday through Friday, from 5:00 a.m. to 5:00 p.m. Pacific Time (excluding holidays), or you can reach Client Support by email at support@chromedata.com.
Registering for the Customer API Portal
-
-
- To setup your account, you will be assigned to your company account. You will then receive an email from support@api.jdpower.com with the subject line: API Portal Account: Setup Required.

- Upon receiving that email, click the Complete Setup link. This will direct you to a Set Password page. Enter your new password and enter again to confirm then select Set Password button.

- You will be directed to the Customer API Portal login page https://portal.jdpower.com/jdp-dev-login/ where you can then enter your account credentials; Username is your email address and Password is the one you’ve just set, then click the Login button.
- To setup your account, you will be assigned to your company account. You will then receive an email from support@api.jdpower.com with the subject line: API Portal Account: Setup Required.
- This will take you to the Customer API Portal homepage https://portal.jdpower.com/
-
Accessing the Portal
Log in to the J.D. Power API Portal at https://portal.jdpower.com using your Username and Password.
If you forget your password, you may select the Forgot Password? link and an email will be sent to your email address with instructions for how to reset your password.

The APIs Page and Its Functionalities
When you log in to the Portal, a page listing APIs opens. This is where you can find a list of all APIs associated with your account. You may access this page at any time using the APIs link within the top section of the Customer API Portal.

Clicking an API’s corresponding eye icon under the Details column opens a page that may include the following:
Click the links in the list above to learn more about each one.
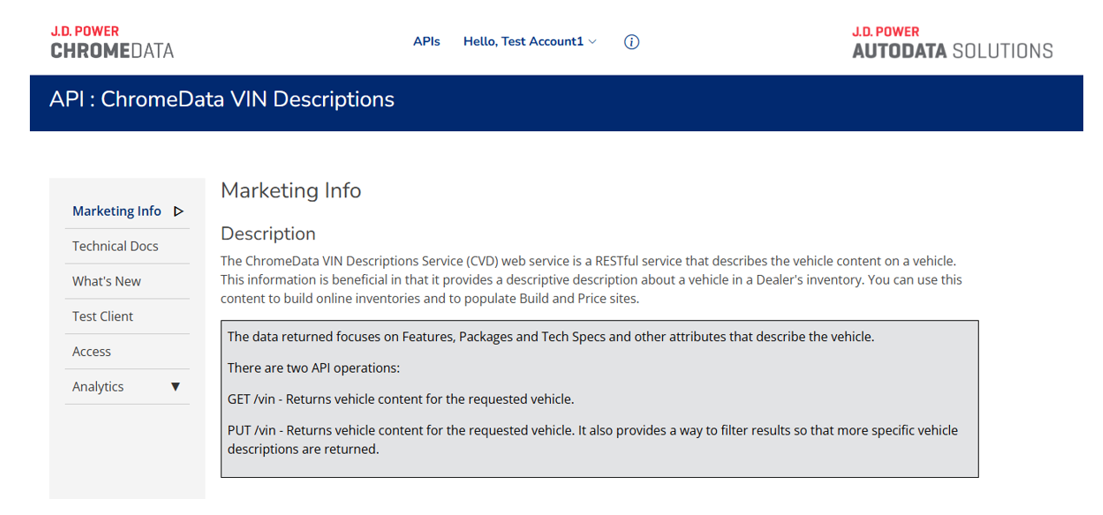
Marketing Info
This page provides the overview of the web service. It includes a description of what the API does and is the default page that opens when you select an API to view.
Technical Docs
The documents on this page provide the information a developer uses to access the API service.

Note: Current and previous versions of the OAS (Open API Spec) and if available, WSDL are available for download by clicking on their icons to the right of the Technical Docs sub-header.
To view documentation associated with an API:
- Open the APIs page.
- Click the API you want to find documentation for.
- Click Technical Docs. A list of existing documentation for the most recent API version displays.
- If necessary, in the Select API Version menu, choose the API version you want to view.
- Click the document. A page opens with the document embedded.
- To download the document, click Download.

What’s New
This is where you can view any news (when available) about a selected API, such as release notes.
To view news associated with an API:
- Open the APIs page.
- Click the API you want to find documentation for.
- Click What’s New. A list of existing documentation for this API displays.
- If necessary, in the Select API Version menu, choose the API version you want to view.
- The content displays on the page.
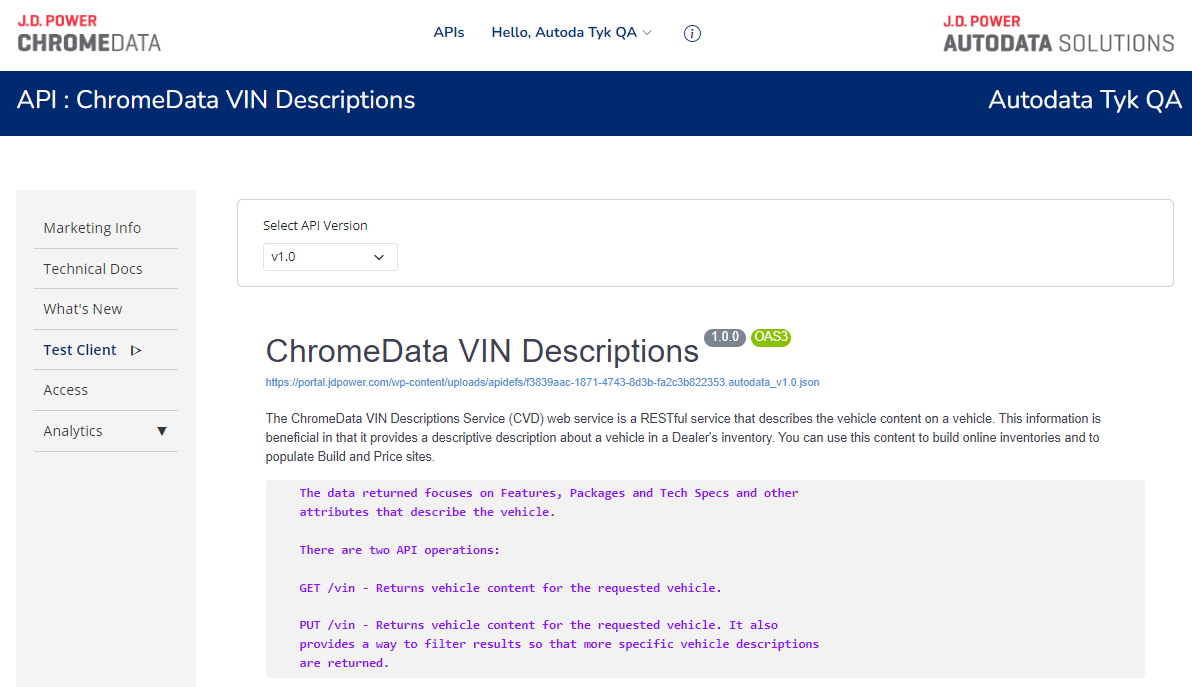
Test Client
The API’s Test Client page provides the ability to test out an API and its operations to get a feel for what is being returned in the response. The .json link beneath the API name includes Open API details (formerly referred to as Swagger) defaulted to the current version. The text beneath the link summarizes the types of operations available. These operations are displayed below on the page as expandable menus.
To test an API:
- Open the Portal. The APIs page opens.
- Find the API you want and click the eye icon associated with it (under the Details column).
- In the left navigation menu, click Test Client.
- On the Test Client page, select the API Version.
- Click the dropdown to expand the options for the type of API operation you want to perform.
- Click Try it out. The text fields are now editable.

- Enter the relevant information into the text fields.

- Click Execute.
The request is sent, and response details are returned below on the page. The sample below shows a GET operation expanded.

Downloading the Response
After you execute a request, you can download the response in JSON format.
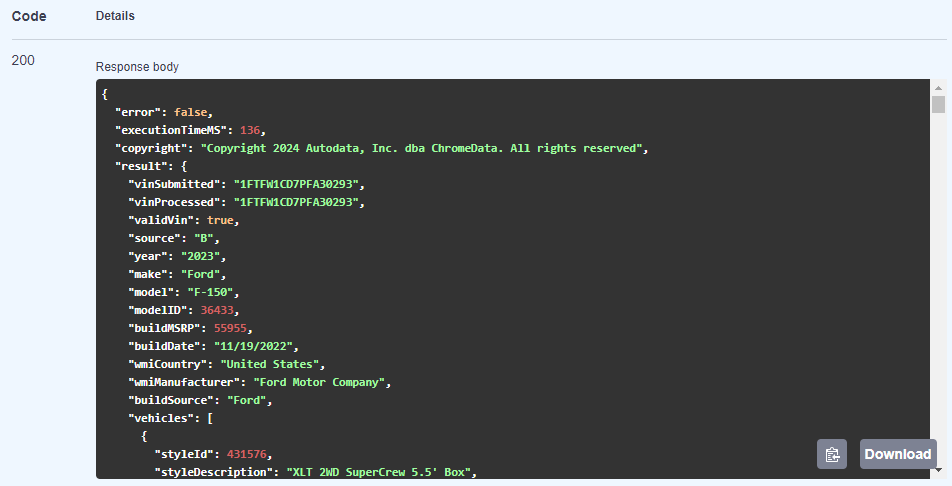
To download the response:
- After executing a request, scroll down the Responses and find the server response code you want to download.
- Click Download hovering in lower right of the Response body.
- When the download finishes, open it from your browser or the Downloads folder in File Explorer to view it in Notepad.
Access
This page contains a list of keys the customer has access to for the API and version, as well as the secrets for each. You can also view the API version, limit, quote and expiration date (if a trial) on this page.

To copy a key or secret:
-
- Find the key/secret you want to copy. Tip: Use the filters to help narrow the listings.
- Click the Copy icon beside the key/secret name. The key/secret is in your clipboard.

Note: The secrets are hidden by default; to reveal a secret, click the eye icon beside the secret.
Analytics
There are two options under Analytics: Recent Transactions and Usage.
Recent Transactions
![]()
This is where you can see any recent transactions with the selected API for up to seven days. You can search for calls using the following filters:
- API Key
- Version
- Timestamp
- Status Code
![]()
Search results are color-coded for each operation (e.g., “GET”, “PUT”, etc). You can click a result to expand it and view metadata details about it.
Usage
This page gives a summary of reports for calls made over the last 30 days as well as a monthly usage summary for the current calendar year. This summary report is for all the profiles attached to your account. Tabs above the summary reports represent the different profiles you might have – click the tabs to see summaries for each profile.

Usage Report for Trials
If you’re currently on a trial account for the API, this page provides a weekly summary of reports for calls made over the trial period. Tabs above the summary reports represent the different profiles you might have – click the tabs to see summaries for each profile.
Note: The Usage report may not include today’s transactions.
Managing Team Members
Only Team Members with the Admin role can manage the team members associated with their organization. If you need to change the Admin role for your organization or add a member to be your Admin, please contact our Client Support team and they can assist you.
- Select the dropdown for your Hello [Customer Name] at the top of the Customer API Portal page and choose Team.

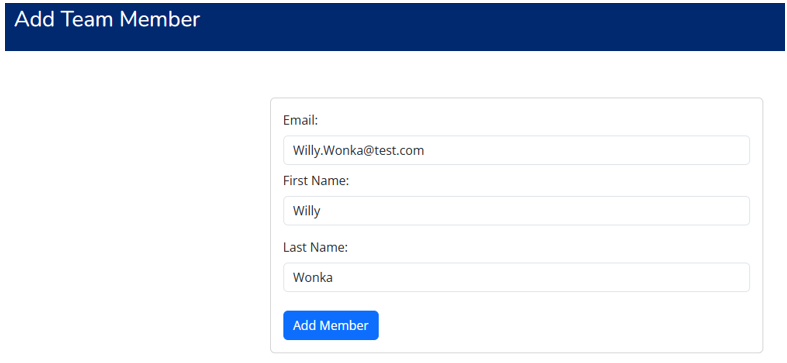
- To add a team member, select the link for Add Team Member in upper right of list of team members.
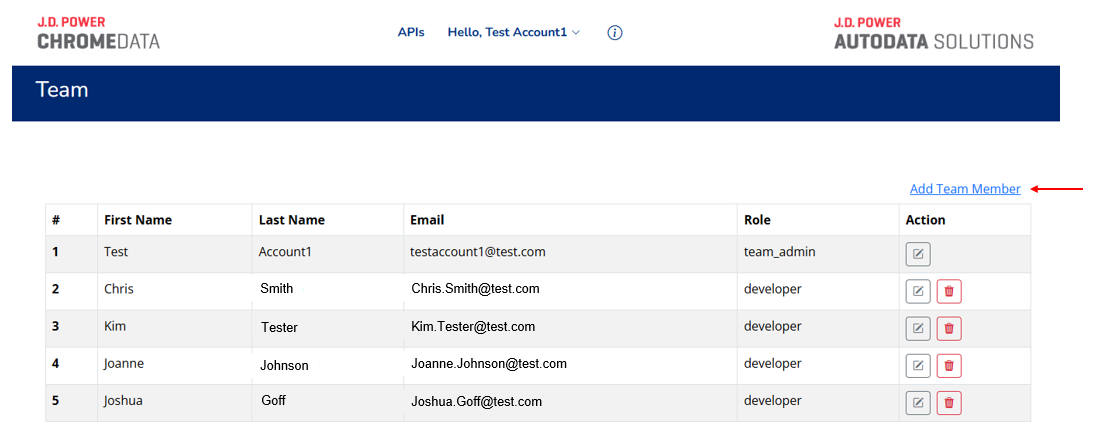
- Enter the team member’s email address, First and Last Name and click the Add Member button.
- The team member will receive a Welcome Email to complete their account setup, including setting their password.
- If you wish to edit or delete a team member, there are icons to perform either task.